
You're standing in a soaked hallway, a tarped roof leak is still dripping, and the insurer has already asked for “a better estimate.” People in Oregon and Washington have photos, maybe a contractor quote, and a rough sense of what broke. What they usually don't have is a repair estimate template that reads the way an adjuster expects, line by line, with scope notes and evidence tied together cleanly.
That gap matters. A repair estimate isn't just a price sheet, it's the document that turns damage into a reviewable claim file, with client details, itemized parts, labor, materials, and a total cost. Template libraries and invoicing tools have standardized that format across vehicles, homes, and equipment, which is why estimate forms now routinely include date, estimate number, quantities, unit prices, and labor hours, not just a bottom-line number (template.net repair estimate templates). In insurer-facing claims work, the format often matters as much as the math.
Why a Repair Estimate Template Matters After Property Damage
A homeowner calls after a windstorm tears shingles loose on a Portland roof. The contractor sends a short quote, the owner forwards phone photos, and the claim sits because the file still does not answer the adjuster's real questions, what was damaged, what code-related work is included, what has been documented, and what needs to be approved before repairs start. A repair estimate template gives the file a structure that fits those questions from the start.
A casual quote can say “replace roof section” and stop there. An insurer-ready estimate shows scope, measurements, line-item pricing, and notes that connect each charge to the loss. It turns an open-ended repair need into a line-item quote that can be reviewed, challenged, or approved without guesswork. Use a template that enforces scope notes, itemized pricing, and photo cross-references from the first draft onward.
What the insurer is actually reading
Adjusters are not just looking for a total. They are checking whether the estimate explains the cause of loss, ties the damage to specific components, and leaves a paper trail for supplements if more damage shows up after tear-out. In Oregon and Washington, that matters when the first inspection is limited and the scope expands later. If the template does not leave room for revisions, notes, and cross-references, the claim file gets harder to defend when the carrier asks for a supplement.
Practical rule: if the estimate cannot survive a line-by-line review, it will not survive a scope dispute.
For policyholders trying to organize the early file, a mitigation checklist helps keep the loss from spreading while the estimate is still being built, and it also preserves evidence that later supports the scope (mitigation of damages guidance). The point is simple. The template is part of the claim strategy from day one.
The Core Sections Every Repair Estimate Template Needs
A good claim estimate starts with identification, not prices. If the top of the page doesn't clearly show the claim number, policyholder name, property address, loss location, and date of loss, an adjuster may treat the document like a general contractor quote instead of a claim-ready estimate. That slows the file down before pricing even gets discussed.
Build the document in the order an adjuster expects
Start with the claim and policy information, then identify the property, the damaged area, and the covered peril in plain language. Next comes a scope-of-work narrative, which should describe what was damaged, what was removed, and what will be restored. Only after that should the template move into the line-item table with quantities, unit prices, labor hours, and materials.
The next block should show totals clearly, including any tax, overhead, profit, or permit-related entries that apply under the policy and local requirements. If those figures are buried or unlabeled, the insurer may strip them out during review. Signature lines, date fields, and a revision area matter too, because they show who prepared the estimate and when it was last updated.
A claim estimate should read like a file note with pricing attached, not a sales quote with insurance language sprinkled on top.
Sections at a glance
| Section | Purpose | What Triggers a Pushback |
|---|---|---|
| Claim and policy details | Links the estimate to the right file | Missing claim number, wrong property address |
| Loss description | Explains what happened and where | Vague cause of loss, no tie to damaged area |
| Scope narrative | Tells the repair story in plain terms | Generic wording, no removal or replacement detail |
| Line-item pricing | Breaks work into defensible units | Lump-sum pricing with no labor or quantities |
| Tax, overhead, and profit | Shows added costs separately | Hidden or unsupported markup |
| Revision and signature block | Creates an audit trail | No date, no version control, no approval record |
For a practical example of how scope and pricing language can be framed on a roof-related claim, the PropLab deal-making guide is a useful reference point because it shows how estimate structure affects negotiation clarity. The core lesson is the same across property losses, if a block is missing, the insurer has an easy reason to slow the file or narrow payment.
Pricing Line Items With Real Regional Labor and Material Data
Pricing is where a repair estimate template either holds up or falls apart. If the line items look guessed, the adjuster will look for a reason to trim them. If they're built from current labor and material data, with quantities and hours that make sense for the Pacific Northwest, the file reads like a real restoration plan instead of a placeholder.
Price the work as discrete, reviewable tasks
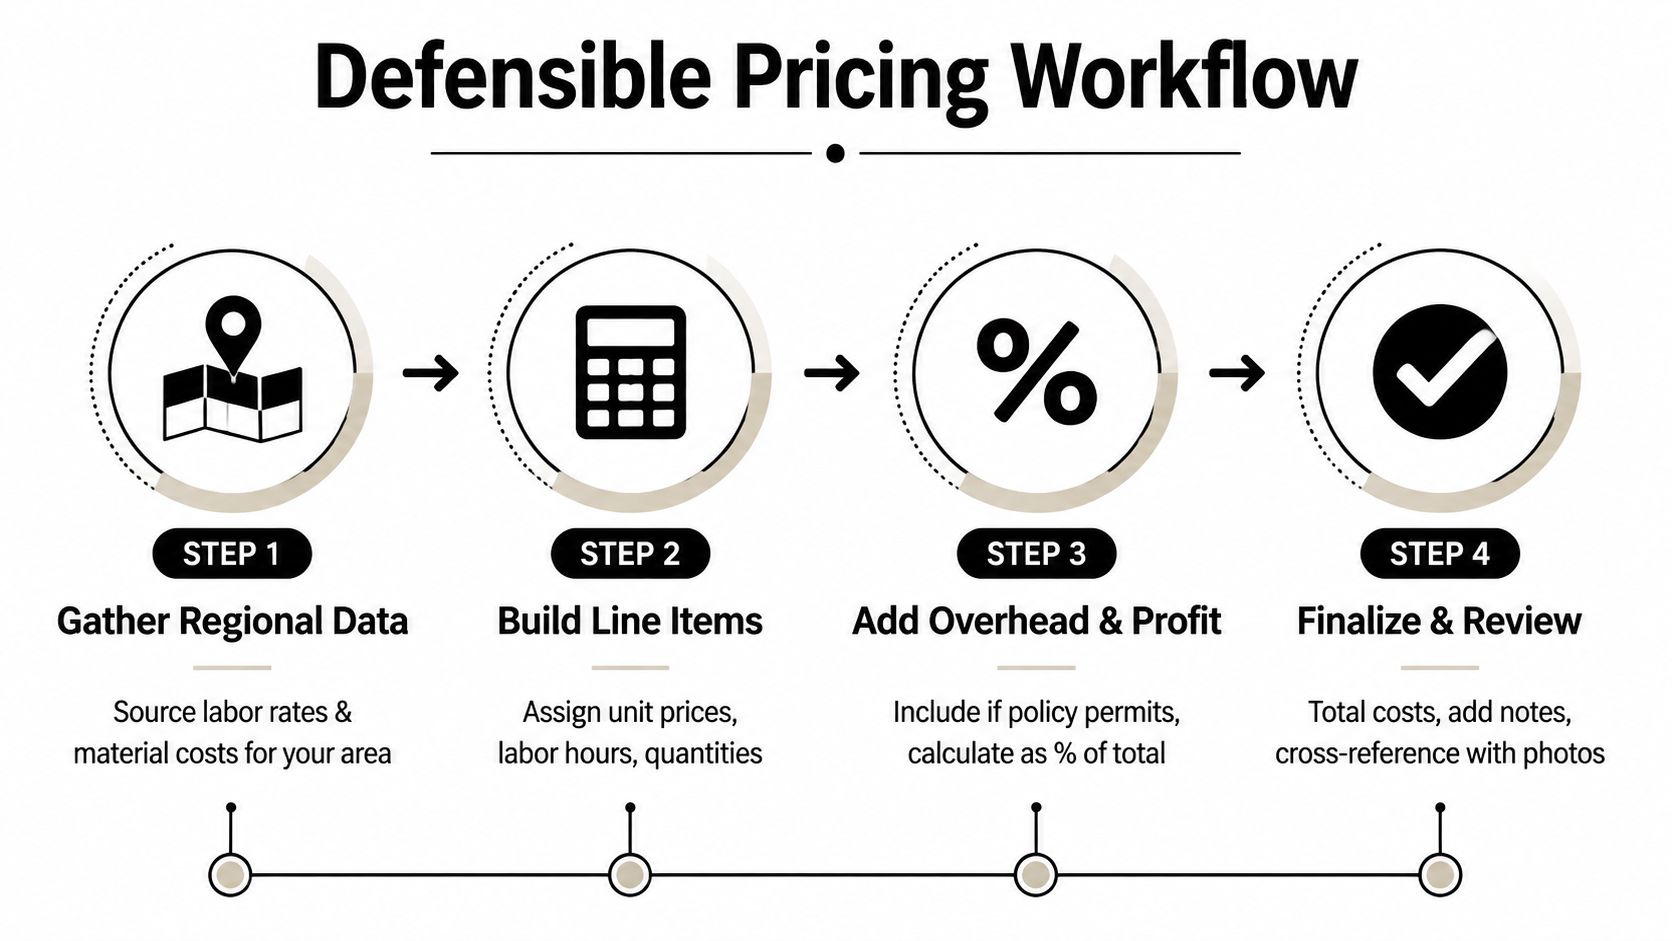
Break the estimate into specific tasks, such as tear-off, debris handling, underlayment, drywall replacement, insulation, painting, and cleanup. Use unit pricing for materials and separate labor hours where the work is labor-heavy. That structure helps the carrier see what's being bought, what's being installed, and what time is attached to each step.
Regional context matters in Oregon and Washington because pricing has to reflect the market where the work happens, not a generic national average. A template that supports fast repricing also matters because repair costs have remained volatile in many markets, while newer software workflows lean toward digital estimate generation, editable online forms, PDF handling, audit trails, and time-stamped revisions (Arcsite estimate template guidance). If a material changes after issuance, the cleanest move is to revise the affected line, note the reason, and keep the earlier version in the file.
Supplements should extend the original estimate
Tear-out often reveals more damage. When that happens, don't replace the first estimate with a brand-new document and hope nobody notices. Add a supplement that references the original line numbers, explains what changed, and attaches the new evidence. That keeps the claim history intact and makes it harder for the insurer to argue that the expanded scope came out of nowhere.
Use a supplement when the scope changed, not when the paperwork got messy.
For teams that work in Xactimate or a similar estimating platform, training matters because the software is only as good as the person entering the scope. The Verisk Xactimate training resource is relevant here because it reinforces how line items, labor logic, and price structure fit together in claim work.
A template should never freeze pricing in time. It should be able to absorb revised material costs, changed conditions, and added scope while keeping the original file readable.
A Filled Example for a Storm Damage Claim in the Pacific Northwest
A Portland-area homeowner gets roof damage from a storm, then finds staining on an upstairs ceiling after the first rain. The estimate that survives review does more than say “repair roof and interior.” It separates the exterior loss from the interior water intrusion, then ties each repair to a specific observation and photo.
The roof section might list selective shingle removal, underlayment replacement, flashing work, and disposal as separate lines. The interior section might include drywall cutout, insulation replacement, stain sealing, texture repair, and repainting as its own sequence. Where code-related items are needed, they should be written as separate entries with a short note explaining why the upgrade is required under the applicable building standard, not lumped into an all-purpose restoration line.
The strongest filled templates also show depreciation notes clearly when they apply, then distinguish recoverable amounts from what's still pending. That matters because adjusters want to see what was damaged, what's being restored, and what belongs in the supplement track instead of the base scope. In a roof claim, the file needs to read in order, cause, damage observation, removal scope, replacement specification, then markup.
For roofing-specific estimating workflow, Exayard roofing estimating software is one of the tools people use to keep the roof portion of a file organized, especially when measurements, photos, and scope notes all need to stay aligned.
What makes the example persuasive
The estimate works because each major line has a purpose. Roof lines stay together where the work is continuous, while interior water-damage lines are separated because the damage path and repair method are different. Overhead and profit, when allowed by the policy and scope, belong in their own place rather than hidden inside a labor rate. Photo references should sit next to the specific line they support, so the adjuster can move from pricing to evidence without guessing.
For policyholders trying to understand roof-related coverage questions before they price the work, roof damage insurance coverage guidance helps frame what belongs in the loss file and what likely needs additional support.
Linking Photos and Documentation to Specific Estimate Lines
A strong repair estimate template doesn't ask the adjuster to trust the summary. It points to the evidence. That means the photos, invoices, inspection notes, and contractor observations need to live in the same packet and be referenced in the body of the estimate, not dumped into a loose folder after the fact.
Organize the file by line item, not by file type
Before cleanup, capture wide shots that show the room, roof plane, elevation, or affected system in context. Then take closer shots of the damage itself, including stains, lifted materials, impact points, and any secondary damage that helps explain why the repair scope is broader than a single visible spot. Label those images so they can be matched to estimate line numbers later.
Invoices and inspection reports should sit beside the estimate in the final PDF packet, especially when they support hidden damage, emergency mitigation, or prior repairs that affect the current scope. Contractor notes are helpful when they explain why a material was removed, why matching is difficult, or why the repair method changed after demolition. The goal is to build one readable claim package that an adjuster can move through without asking for a separate explanation at every step.
If a photo supports a line item, make that connection explicit in the estimate notes.
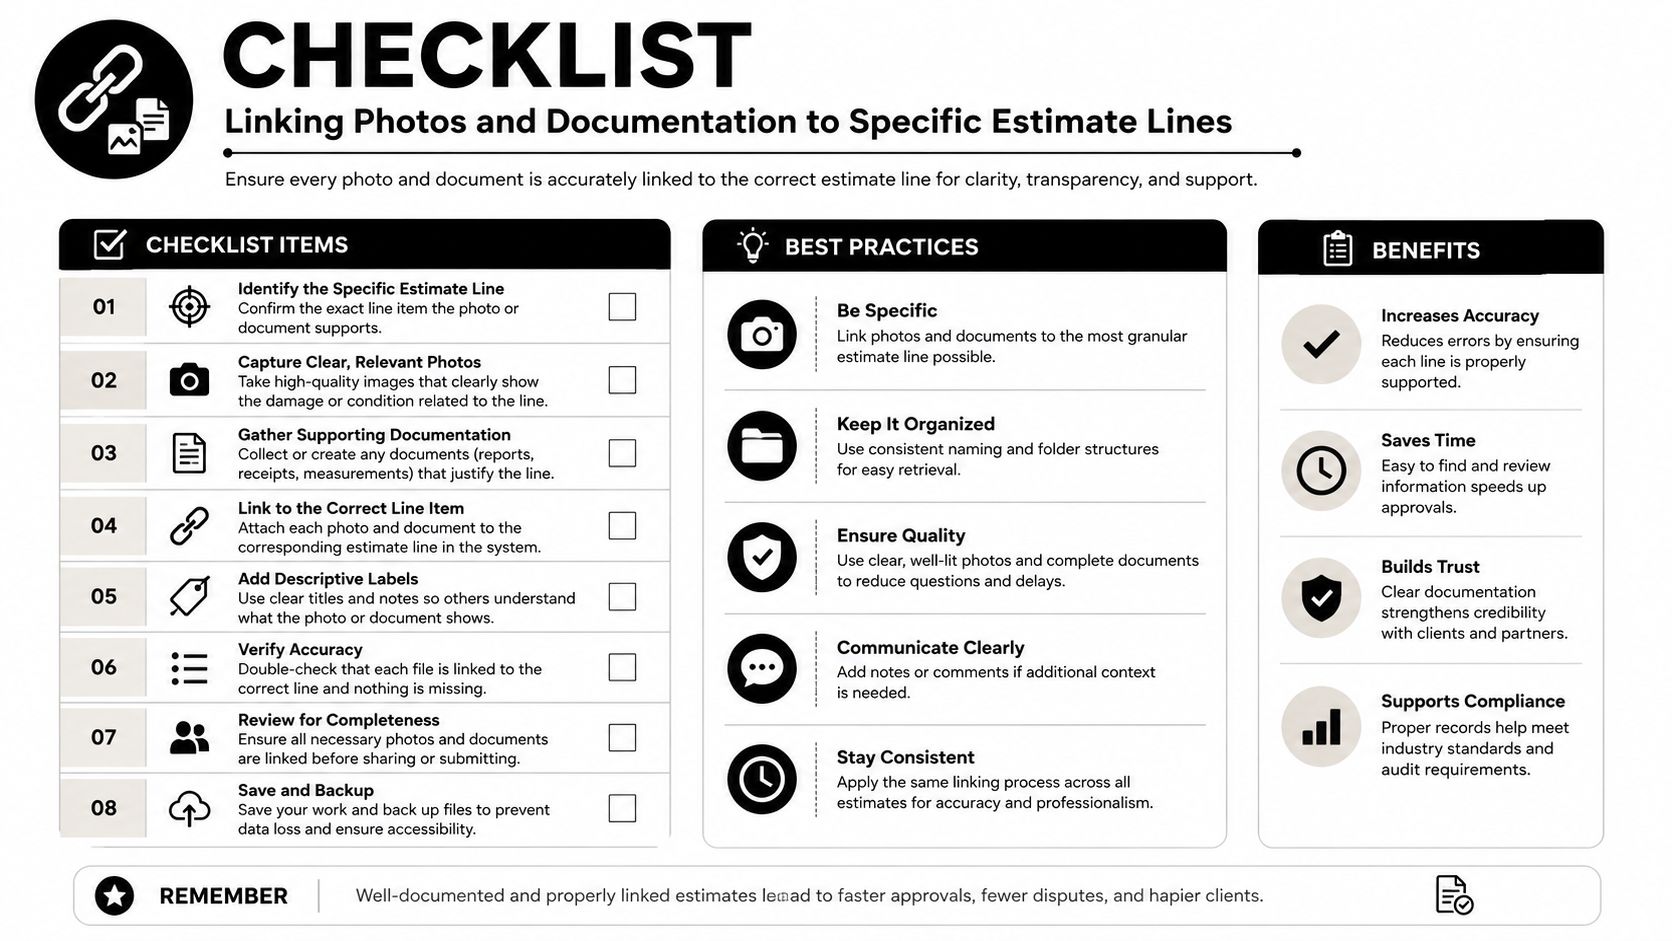
A clean packet should answer these questions fast:
- What was damaged? Show the item, the location, and the cause.
- What was measured? Tie the quantity to the photo or inspection note.
- What was removed? Match demolition photos to the replacement line.
- What still needs review? Flag any open scope for supplement handling.
For evidence handling, the evidence preservation guidance is worth reviewing because it reinforces the practical side of claim documentation. Once cleanup starts, some of the clearest proof disappears, and the estimate has to carry more of the burden.
Common Mistakes That Lead to Underpaid Claims
The same errors show up again and again in underpaid files. They're usually not dramatic mistakes, just small omissions that give the insurer a clean reason to cut the estimate.

The errors that invite pushback
- Leaving out overhead and profit when the policy and scope support it. The carrier can deny what isn't clearly listed, so separate it and explain why it's there.
- Underpricing debris removal. If demolition and haul-off are part of the work, they need their own line, not an implied allowance.
- Skipping code-related items. When local requirements change the repair method, the estimate has to say so plainly.
- Omitting permit fees where they apply. An adjuster will often ask why they weren't included if the work clearly needs permitting.
- Using blurry or unsorted photos. Unclear evidence weakens an otherwise good estimate.
- Substituting a contractor quote for an insurer-grade estimate. A quote may be enough to start a conversation, but it often isn't enough to defend scope.
- Failing to track supplements. Once the scope expands, the file needs a paper trail that shows what was original and what was added.
Those mistakes show up differently in Oregon and Washington, too. Earthquake-related claims can involve deductible math that changes the insured's expectations fast, and wildfire smoke losses need documentation that describes contamination, affected surfaces, and cleaning or replacement rationale instead of just “smoke smell.” If the template doesn't make room for that detail, the insurer usually fills the silence with a narrower scope.
The fix is consistency. Use a template that forces every material line, every labor entry, every photo reference, and every supplement note into the file before you send it.
When to Bring in a Public Adjuster and What to Hand Them
Bring in a licensed Oregon or Washington public adjuster when the insurer's estimate comes in short on scope, when a denial is issued, or when the repair keeps growing after inspections and demolition. At that point, the file usually needs a policy-side reviewer who can line up the estimate language, the photos, and the missing scope into a position that can be negotiated.
Hand over the completed template, the photo packet, inspection notes, contractor estimates, mitigation records, and every supplement version. The strongest files make it easy to see what was claimed first, what the insurer paid, and what still needs support. If the template already separates line items, notes, and evidence references, the adjuster can verify the original scope against the paid scope without sorting through a pile of loose documents.
A repair estimate template also helps you decide whether the file has outgrown a basic contractor exchange. If the insurer is disputing room-by-room scope, separate trade pricing, code-related repairs, or repeated supplements, that is usually the point to hand the file to a public adjuster who knows when to step in. The template does not replace representation. It gives representation a clean record to work from, and that is what keeps the claim from turning into a guessing match.